HTML5 Game Tutorial: The Module Pattern
I recently completed an Endless Runner style game for Gamedevtuts+ for an article on Spritesheet Animation. They have graciously allowed me to write a tutorial series on my site about how I created it. This article is the first of three articles that will explain how to create an endless runner style HTML5 game from scratch.
Code: https://github.com/straker/endless-runner-html5-game
Part 1
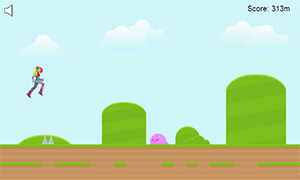
In this tutorial, we’ll learn how to use a technique known as the module pattern to create game objects and organize our code. To begin, let’s look at the final product you will be creating. Click inside the game if the controls aren’t working.
Controls: Jump – Spacebar
As you can see, the game has a full game state (menu system, game, restart ability, etc.) and is a lot more polished than my previous canvas game tutorial. Also, the music doesn’t play automatically which is a huge plus. The music starts off by default and the user has to turn it on if they wish to hear it.
The HTML Page
We’ll first start by defining our HTML page and CSS rules.
<!DOCTYPE html>
<html>
<head>
<meta charset="UTF-8">
<title>Kandi Runner</title>
<link rel="stylesheet" href="kandi.css" type="text/css" media="screen">
</head>
<body>
<div class="wrapper">
<canvas id="canvas" width="800" height="480">
<p>You're browser does not support the required functionality to play this game.</p>
<p>Please update to a modern browser such as <a href="www.google.com/chrome/">Google Chrome</a> to play.</p>
</canvas>
</div>
<script type="text/javascript" src="kandi.js"></script>
</body>
</html>
Nothing too special going on here. We’re loading our stylesheet and JavaScript code and creating the canvas element which will tell users if their browser doesn’t support the Canvas element (as well as refer them to a browser that does).
The basic CSS for our game is as follows:
body {

  font-family: arial, sans-serif;

  font-size: 16px;

}
.wrapper {

  width: 600px;

  height: 360px;

  position: absolute;

  top: 5px;

  left: 5px;

}
canvas {

  position: absolute;

  top: 0;

  left: 0;

  border: 1px solid black;

  z-index: 1;

  width: 600px;

  height: 360px;

  -webkit-box-sizing: border-box;

  -moz-box-sizing: border-box;

  box-sizing: border-box;

}
This will position the game inside the wrapper div and set the game to sit 5px from the top and 5px from the left of the screen. The box-sizing CSS property allows the canvas to have a border of 1px and not have the extra 2px for the border affect the overall game size.
You may have noticed that while we set the size of the canvas to be 800×480 in the HTML, in the CSS we set the size to be 600×360. I originally designed the game to be 800×480, but then we wanted to embed the game inside of the article which was about 650px wide.
Instead of recreating all the graphics and editing the game to fit the 600px width limit, I let CSS scale the canvas down for me. By using CSS to change the height or width of the canvas, CSS will proportionally scale the game for you while maintaining pretty decent image quality. It’s a really nice trick if you need a smaller game size.
Before we talk about the JavaScript side of the game, we need to talk about a few patterns that are used a lot in JavaScript: immediately-invoked function expression, the module pattern, and closures.
Immediately-Invoked Function Expression
When I wrote my first tutorial, I used a concept that confused some readers to create a singleton. Initially I thought that using new function() was the way to do it, but I later realized that this was the wrong way to go about it (mostly because it isn’t standard but it still works the same).
Instead, the “proper” (read: more standard) way to create a singleton in JavaScript is to create what is called a immediately-invoked function expression.
There are many names for doing this: immediately-invoked function expression (IIFE), self-invoking function, and self-executing anonymous function. I’m not entirely sure why IIFEs are called by so many different names, but the JavaScript community seems to think that the proper name is immediately-invoked function expression.
Regardless of the name (a rose by any other name, etc. etc.), the point of an IIFE is to create a closure (more on that later) whereby all the variables and functions inside the IIFE are not visible outside of it’s scope.
An IIFE is declared by surrounding a function with parenthesis and executing it.
(function() {

  var hidden = "You can't see me.";

})();
console.log(hidden);  // ReferenceError: hidden is not defined
By wrapping a function inside parenthesis, JavaScript turns the function declaration into an expression. When you execute (or invoke) the expression by calling it (the two parenthesis at the end), the expression gets evaluated immediately. Thus, the pattern is called an immediately-invoked function expression.
When an IIFE returns an object, a singleton is created.
var singleton = (function() {

  var visible = "Now you can see me.";
  return {

    visible : visible

  }

})();
console.log(singleton.visible);  // "Now you can see me."
You’re probably already familiar with this pattern if you’ve used Paul Irish’s request animation polyfill (which you should be using):
var requestAnimFrame = (function(){

  return window.requestAnimationFrame       ||

         window.webkitRequestAnimationFrame ||

         window.mozRequestAnimationFrame    ||

         window.oRequestAnimationFrame      ||

         window.msRequestAnimationFrame     ||

         function(callback, element){

           window.setTimeout(callback, 1000 / 60);

         };

})();
The Module Pattern
The technique of returning properties from an IIFE is known as the module pattern. The pattern we are using is called module export since we are exporting (returning) properties from inside the IIFE so that they can be used outside the IIFE.
Not only can you export properties in an IIFE, but you can also import properties as well. This works just like passing a variable to a function.
(function($) {

  // the IIFE now has access to jQuery through "$"

})(jQuery);
The best part about module import is that the variable’s state is saved when passed into the IIFE. This will become important later on when we discuss the asset loader module.
Closures
IIFEs are directly related to closures. A closure is simply a function that is inside of another function. The outer function cannot access any of the inner functions variables, but the inner function can access any of the outer functions variables. In other words, JavaScript uses closures to create object-oriented patterns.
You’ve seen closures at work if you’ve used constructor functions:
function Greeting() {

  var saying = "hello";
  this.sayHello = function() {  // JavaScript closure

    var name = "Bob";
    console.log(saying + " " + name);

  }
  this.sayGoodbye = function() {

    // this function cannot access the variable 'name' from the previous closure

    console.log("goodbye '" + name + "'");

  }

}
greet = new Greeting();

greet.sayHello();    // "hello Bob"

greet.sayGoodbye();  // "goodbye ""
Because the variable name was declared inside of the closure, the function sayGoodbye cannot access it. This may seem obvious, and it is, but there is one very important thing to remember when dealing with closures: closures retain the this reference to the scope that they were created in.
This is best explained by an example. Suppose you have a constructor function which has a public variable. Let’s also say you have a private helper function that will do some calculation on the variable, and that the helper function is used by a public function:
function Example() {

  this.base = 10;  // public variable
  function isEven() {  // private helper function

    return this.base % 2 === 0;

  }
  this.calculate = function() {  // public function

    if (isEven()) {

      console.log("even");

    }

    else {

      console.log("odd");

    }

  }

}
e = new Example();

e.calculate();  // "odd"
In this simple example, we would expect that the output of this.calculate() to be ‘even’, but instead we get ‘odd’. But why is that? Obviously 10 is an even number, so why does it think it’s odd?
The catch here is that the isEven() function is a closure, and since it was declared as an entity of the function (and not as a property of the function, i.e. this.isEven()), the this reference no longer points to the Example function. Since the this reference is not the Example function, this.base does not exist inside of the closure. This is why isEven() returns false since undefined % 2 === false.
There are three methods used to get around this problem. The first is to create a private reference to the this pointer and use that inside of the closure instead of this:
function Example() {

  var _this = this;

  this.base = 10;
  function isEven() {

    return _this.base % 2 === 0;  // this will return true

  }
  // …

}
Another method is to use the call method to pass the correct this reference:
function Example() {

  // …
  this.calculate = function() {

    if (isEven.call(this))  // this will return true

    // …

  }

}
The last method is to bind the function to the correct scope:
function Example() {

  this.base = 10;
  function isEven() {

    return this.base % 2 === 0;

  }
  var isEven = isEven.bind(this); // this will return true
  // …

}
I haven’t found anything that says one way or another if one of these methods is more correct, but I personally like creating a private reference to the this pointer.
The JavaScript
Now that we’ve talked about IIFEs and closures, we have the basis for creating our game.
(function () {

  // define variables

  var canvas = document.getElementById("canvas");

  var ctx = canvas.getContext("2d");

  var player = {};

  var ground = [];

  var platformWidth = 32;

  var platformHeight = canvas.height - platformWidth * 4;
  /**

   * Request Animation Polyfill

   */

  var requestAnimFrame = (function(){

    return  window.requestAnimationFrame       ||

            window.webkitRequestAnimationFrame ||

            window.mozRequestAnimationFrame    ||

            window.oRequestAnimationFrame      ||

            window.msRequestAnimationFrame     ||

            function(callback, element){

              window.setTimeout(callback, 1000 / 60);

            };

  })();
  /**

   * Asset pre-loader object. Loads all images and sounds

   */

  var assetLoader = (function() {

    // …

  })();

})();
The first thing we do is enclose our code inside an IIFE. This is a very popular pattern as it prevents all of our variables and functions from being put into the global namespace, potentially causing problems in the future. A note about this technique: if you are debugging your program it helps to remove the IIFE since you won’t be able to access anything from the console if your program is enclosed in an IIFE.
We next get our canvas and canvas context so we can use them and we also set some default variables for where the platforms will be placed (4 rows from the bottom). We also create the request animation polyfill to use when we animate. Lastly, we create the beginnings of the asset loader module.
Asset Loader Module
The primary purpose of the asset loader module is to create an object that holds all of our Image and Audio objects so that we can reference them whenever we need them. The secondary purpose of the asset loader is to know when all the assets have finished downloading so we know when to start the game. If, for example, we tried to draw an Image to the canvas before it was finished downloading, nothing would be drawn.
My first attempt to create an asset loader wasn’t very good. A lot of code was repeated that really made it messy to work with. I have since then improved greatly on the idea which has in turn made it easier to work with.
/**

 * Asset pre-loader object. Loads all images

 */

var assetLoader = (function() {

  // images dictionary

  this.imgs        = {

    "bg"            : "imgs/bg.png",

    "sky"           : "imgs/sky.png",

    "backdrop"      : "imgs/backdrop.png",

    "backdrop2"     : "imgs/backdrop_ground.png",

    "grass"         : "imgs/grass.png",

    "avatar_normal" : "imgs/normal_walk.png"

  };
  var assetsLoaded = 0;                                // how many assets have been loaded

  var numImgs      = Object.keys(this.imgs).length;    // total number of image assets

  this.totalAssest = numImgs;                          // total number of assets
  /**

   * Ensure all assets are loaded before using them

   * @param {number} dic  - Dictionary name ('imgs')

   * @param {number} name - Asset name in the dictionary

   */

  function assetLoaded(dic, name) {

    // don't count assets that have already loaded

    if (this[dic][name].status !== "loading" ) {

      return;

    }
    this[dic][name].status = "loaded";

    assetsLoaded++;
    // finished callback

    if (assetsLoaded === this.totalAssest && typeof this.finished === "function") {

      this.finished();

    }

  }
  /**

   * Create assets, set callback for asset loading, set asset source

   */

  this.downloadAll = function() {

    var _this = this;

    var src;
    // load images

    for (var img in this.imgs) {

      if (this.imgs.hasOwnProperty(img)) {

        src = this.imgs[img];
        // create a closure for event binding

        (function(_this, img) {

          _this.imgs[img] = new Image();

          _this.imgs[img].status = "loading";

          _this.imgs[img].name = img;

          _this.imgs[img].onload = function() { assetLoaded.call(_this, "imgs", img) };

          _this.imgs[img].src = src;

        })(_this, img);

      }

    }

  }
  return {

    imgs: this.imgs,

    totalAssest: this.totalAssest,

    downloadAll: this.downloadAll

  };

})();
assetLoader.finished = function() {

  startGame();

}
There’s a lot going on here, so let’s take it one step at a time.
We first create an object that lists all of our image assets as well as their paths. We then count how many images are in the object using Object.keys(). This let’s us know how many assets need to load before we start the game.
Next we create a callback function assetLoaded() which takes the name of a dictionary (since we’re only loading images there is only one dictionary), and the name of the asset from that dictionary that loaded. The function marks the asset as loaded and increments our asset counter assetsLoaded. Finally, if all assets have finished loading it will call the function this.finished() if it has been defined. By defining the function at the end, we know when all of our assets have loaded.
We then create a function Image object, marks it as loading, gives it a callback function once it has loaded, and sets its source.
Notice that we wrap the process inside an IIFE. This is important because we are assigning a callback that uses the img variable. If we didn’t wrap it in an IIFE, the onload() function callback would always pass the name of the last asset in the imgs object.
for (var i = 0; i < 10; i++) {

   setTimeout(function() { console.log(i); }, 1000);  // prints "10" ten times

}
This happens because the variable img has already progressed through the entire loop before the onload() function is called. Therefore, when dealing with asynchronous calls it is important that we save the state of any variables we are using so that the state of the variable doesn’t change before the asynchronous call finishes. This is where IIFEs come in handy since they will save the state of the variable when it was passed to the IIFE.
for (var i = 0; i < 10; i++) {

   (function(i) {

     setTimeout(function() { console.log(i); }, 1000);  // prints 0-9

   })(i);

}
The last thing the asset loader does is return an object with the properties we want made accessible.
Once the asset loader has finished loading all of the images, any image can now be accessed by using assetLoader.imgs[imageName].
Spritesheet
With the asset loader ready to go, we can now create a spritesheet animation for our main character. You can read more about this from the article I wrote.
/**

 * Creates a Spritesheet

 * @param {string} - Path to the image.

 * @param {number} - Width (in px) of each frame.

 * @param {number} - Height (in px) of each frame.

 */

function SpriteSheet(path, frameWidth, frameHeight) {

  this.image = new Image();

  this.frameWidth = frameWidth;

  this.frameHeight = frameHeight;
  // calculate the number of frames in a row after the image loads

  var self = this;

  this.image.onload = function() {

    self.framesPerRow = Math.floor(self.image.width / self.frameWidth);

  };
  this.image.src = path;

}
/**

 * Creates an animation from a spritesheet.

 * @param {SpriteSheet} - The spritesheet used to create the animation.

 * @param {number}      - Number of frames to wait for before transitioning the animation.

 * @param {array}       - Range or sequence of frame numbers for the animation.

 * @param {boolean}     - Repeat the animation once completed.

 */

function Animation(spritesheet, frameSpeed, startFrame, endFrame) {
  var animationSequence = [];  // array holding the order of the animation

  var currentFrame = 0;        // the current frame to draw

  var counter = 0;             // keep track of frame rate
  // start and end range for frames

  for (var frameNumber = startFrame; frameNumber <= endFrame; frameNumber++)

    animationSequence.push(frameNumber);
  /**

   * Update the animation

   */

  this.update = function() {
    // update to the next frame if it is time

    if (counter == (frameSpeed - 1))

      currentFrame = (currentFrame + 1) % animationSequence.length;
    // update the counter

    counter = (counter + 1) % frameSpeed;

  };
  /**

   * Draw the current frame

   * @param {integer} x - X position to draw

   * @param {integer} y - Y position to draw

   */

  this.draw = function(x, y) {

    // get the row and col of the frame

    var row = Math.floor(animationSequence[currentFrame] / spritesheet.framesPerRow);

    var col = Math.floor(animationSequence[currentFrame] % spritesheet.framesPerRow);
    ctx.drawImage(

      spritesheet.image,

      col * spritesheet.frameWidth, row * spritesheet.frameHeight,

      spritesheet.frameWidth, spritesheet.frameHeight,

      x, y,

      spritesheet.frameWidth, spritesheet.frameHeight);

  };

}
Parallax Background
To make the game more interesting, we’re going to create a parallax background. This technique uses the same effect as the panning background from my first tutorial, only we add more images that scroll at different rates.
/**

 * Create a parallax background

 */

var background = (function() {

  var sky   = {};

  var backdrop = {};

  var backdrop2 = {};
  /**

   * Draw the backgrounds to the screen at different speeds

   */

  this.draw = function() {

    ctx.drawImage(assetLoader.imgs.bg, 0, 0);
    // Pan background

    sky.x -= sky.speed;

    backdrop.x -= backdrop.speed;

    backdrop2.x -= backdrop2.speed;
    // draw images side by side to loop

    ctx.drawImage(assetLoader.imgs.sky, sky.x, sky.y);

    ctx.drawImage(assetLoader.imgs.sky, sky.x + canvas.width, sky.y);
    ctx.drawImage(assetLoader.imgs.backdrop, backdrop.x, backdrop.y);

    ctx.drawImage(assetLoader.imgs.backdrop, backdrop.x + canvas.width, backdrop.y);
    ctx.drawImage(assetLoader.imgs.backdrop2, backdrop2.x, backdrop2.y);

    ctx.drawImage(assetLoader.imgs.backdrop2, backdrop2.x + canvas.width, backdrop2.y);
    // If the image scrolled off the screen, reset

    if (sky.x + assetLoader.imgs.sky.width <= 0)

      sky.x = 0;

    if (backdrop.x + assetLoader.imgs.backdrop.width <= 0)

      backdrop.x = 0;

    if (backdrop2.x + assetLoader.imgs.backdrop2.width <= 0)

      backdrop2.x = 0;

  };
  /**

   * Reset background to zero

   */

  this.reset = function()  {

    sky.x = 0;

    sky.y = 0;

    sky.speed = 0.2;
    backdrop.x = 0;

    backdrop.y = 0;

    backdrop.speed = 0.4;
    backdrop2.x = 0;

    backdrop2.y = 0;

    backdrop2.speed = 0.6;

  }
  return {

    draw: this.draw,

    reset: this.reset

  };

})();
Again, we use an IIFE to create a singleton which exposes only the draw() and reset() functions.
Final Touches
The last thing we need to do is create the animation loop and start the game.
/**

 * Start the game - reset all variables and entities, spawn platforms and water.

 */

function startGame() {

  // setup the player

  player.width  = 60;

  player.height = 96;

  player.speed  = 6;

  player.sheet  = new SpriteSheet("imgs/normal_walk.png", player.width, player.height);

  player.anim   = new Animation(player.sheet, 4, 0, 15);
  // create the ground tiles

  for (i = 0, length = Math.floor(canvas.width / platformWidth) + 1; i < length; i++) {

    ground[i] = {"x": i * platformWidth, "y": platformHeight};

  }
  background.reset();
  animate();

}
/**

 * Game loop

 */

function animate() {

  requestAnimFrame( animate );
  background.draw();
  for (i = 0; i < ground.length; i++) {

    ground[i].x -= player.speed;

    ctx.drawImage(assetLoader.imgs.grass, ground[i].x, ground[i].y);

  }
  if (ground[0].x <= -platformWidth) {

    ground.shift();

    ground.push({"x": ground[ground.length-1].x + platformWidth, "y": platformHeight});

  }
  player.anim.update();

  player.anim.draw(64, 260);

}
assetLoader.downloadAll();
When the game is started, it sets the default player properties. The speed property is used to move all objects on the screen at a constant rate. This movement causes the player to feel like they are moving even though they are standing still.
The game also creates all the ground tiles that the player stands on. We create 2 more tiles then would fit on the screen so that we have a buffer of tiles and they don’t appear to blink into existence when we create them. The last thing it does is reset the background object and start the animation loop.
The animation loop first draws the parallax background to the canvas. It then loops over all the ground tiles and moves them by the the players speed and then draws them. If one of the tiles goes offscreen, it removes it from the array and creates a new one at the end of the array. This creates the effect of a never ending platform.
The animation loop then updates the player’s spritesheet animation and draws it to the screen.
The last thing we do is call the assetLoader’s downloadAll() function to begin the download process and start the game when it’s finished.
And that’s it. You should now have a simple endless runner.
Conclusion
In this tutorial we learned about how to use an immediately-invoked function expression to save variable state for asynchronous calls. We also learned about using the module pattern to create singletons and how closures work. Finally, we put all of that knowledge to use to create the basic structure for an endless runner style game.
In the next tutorial, we’ll add more variety to the game by adding gaps, allowing the player to jump, different platform heights, and enemies.