How I Made My First Game in Two Days
In this first ever guest post, Arijus (argshook) talks about how he developed his first game in only two days. He’ll talk about his experience as well as his development workflow, and even share some tips and insights to help you do the same.
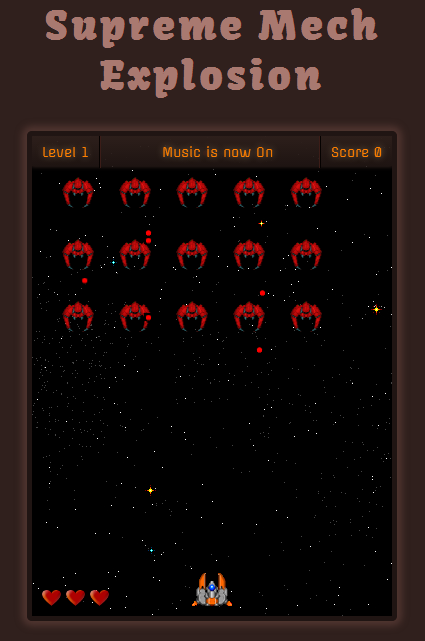
Hello everyone, I’m Arijus, a 21 year old from Lithuania who calls himself argshook online. I followed Steven’s HTML5 game development guide and made Supreme Mech Explosion in just two days. Before that, I had absolutely no game development experience and <canvas> was something yet to be discovered. Here is my experience of how it all worked out.
To begin, I want to talk about my average coding skills, my IDE build that allowed me to work fast, and the way I developed the game itself.
My Skillset
Just to make things clear before I go any further, here is my current skillset:
- I mostly work on front-end web development (but have some back-end experience too)
- HTML, CSS and JavaScript are not strangers, however, not lovers either
- I use elementaryOS and am familiar with the CLI (command line interface)
- I google when I’m in trouble and I google more when I’m in even more trouble
Despite additional libraries and preprocessors this is pretty much it. I really am no guru whatsoever and yet I managed to develop a little game in a fairly short amount of time. If I can, believe me, you can too.
My Toolset
If you don’t care what development tools I use, feel free to skip this section as it’s not directly related to game development.
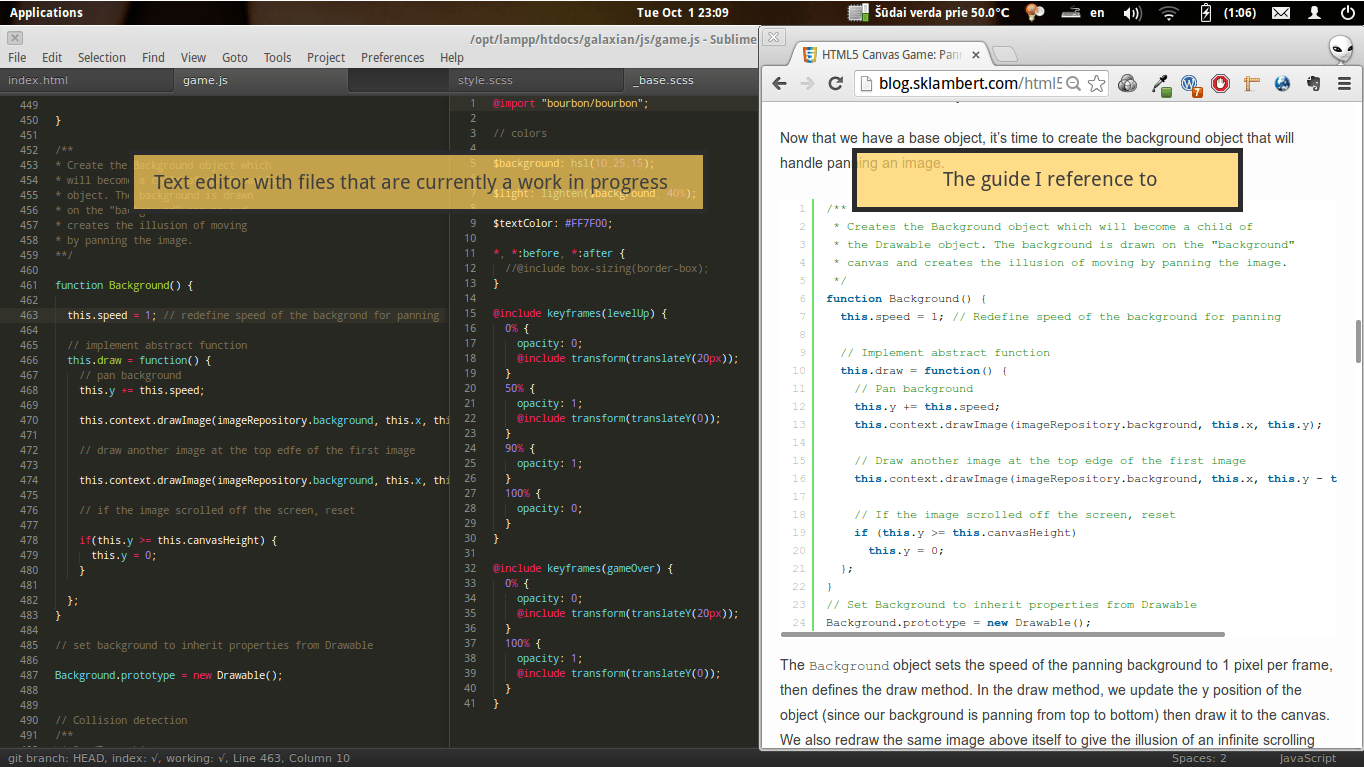
I believe my IDE build is quite useful and is one of the main reasons why it didn’t take long to finish the game. I spend a lot of time trying out lots of different tools and finding the ones that suit me best. It’s always a work in progress and I’ll probably use different things in the future, but this works really well for me now.
Operating System
As I mentioned above, I use elementaryOS. It’s a Ubuntu based Linux distribution that I fell in love with a year ago. It’s very fast, looks nice and is very, very useful. I got really use to multiple desktops and quick window switching. It makes the development process a lot faster and more convenient.
Text editor
Sublime Text is by far my favorite. I always liked it a lot but only after spending some time on this guide did it truly unleashed it’s power.
Use whatever suits you best, just make sure you really know its features, keyboard shortcuts and snippets. Zen code as much as you can as it saves a lot of time!
Browser
Chrome. It’s dev tools are simply incredible.
I hate alt+tabbing sooo much. I try to set up my environment so that I switch windows as rarely as possible and see changes live. Chrome allows me to do that without too much effort. It’s a great time saver.
Be sure to set up your browser to work for you and not the other way around. Check out this article if you’re unfamiliar with the awesome recent features of Chrome dev tools.
Command Line
If you want to speed things up even more, use the command line as much as possible. Linux and Mac machines usually have terminal emulators out-of-the-box. I know that’s not the case on Windows but it seems fixable.
mkdir, mv, cp, ls are all simple but save you tons of time. Although it is confusing if you’re not familiar with the CLI, getting used to it is a great investment for the long run.
Version control
Use it, really. Get familiar with it, it’ll help you a lot one day.
I use git everyday even though I’m an amateur git user. Just a few basic principles are necessary to understand to make it work flawlessly. I know it’s scary at first, but it’s not a foe after a while. This guide will help you get started.
My Workflow
I stumbled upon Steven’s tutorial and decided to just dive into it. Enough is enough, I had too many bookmarks to look through already and <canvas> seemed exciting!
I knew it wouldn’t be easy. I knew I might get lost at some point, that I would probably quit working on it and just bury the game between other unfinished projects. I had to come up with something to make the whole learning process enjoyable. Here’s what I did:
Seeing All at Once
ElementaryOS allows me to work on multiple desktops. I decided to split my working area into two so that I could always see everything I needed without too much effort.
The first desktop contains the text editor and Steven’s guide.
The second one contains Chrome with my code preview and dev tools. This proved to be a great idea and saved me from an alt+tabbing nightmare (yay!).
Most Linux distributions and OS X (probably?) have multiple desktops out-of-the-box. As always, it’s a different case with Windows. You will need third party software for that (you can use VirtuaWin or Dexpot).
Retype it All!
Another thing worth noting is that I retyped (almost) everything from Steven’s guide. Heck, I even retyped the comments. Quite a number of typos, Steven! 🙂
No, I’m not an idiot, I know I can copy-paste stuff. I found retyping is a much better way to learn. This takes more time but most of the new things get stuck in my head and I understand everything a lot better.
Don’t Just Copy – Adjust Everything
While retyping variables, functions, and whatnot, I also made my own changes on the fly. Most notably, I had my own game dimensions and didn’t copy the ones from the guide. This was intentional because I knew I would need to adjust everything else accordingly. And I’m glad I had to!
I also played around with the spawnWave() function and had 15 ships instead of 18. This made me look more carefully at modulus (again…) and use i % 5 === 0 instead of i % 6 === 0.
Also, instead of writing this in the Ship() object:
…

else if (KEY_STATUS.up) {

  this.y -= this.speed

  if (this.y <= this.canvasHeight/4*3)

    this.y = this.canvasHeight/4*3;

}
I wrote
if(KEY_STATUS.up) {

  this.y -= this.speed;

  if(this.y <= 0) {

    this.y = 0;

  }

}
because it was more suitable for my needs. I didn’t want to restrict my ships movement and allow the player to fly everywhere one desires.
I experimented a lot with each function (except for QuadTree, because duck QuadTree) until it behaved the way I wanted. I usually ended up with what I began with, but experimenting and trying different values out let me understand everything much better.
Skipping is Bad
Whenever I typed a function from the guide I carefully looked through it all, trying to understand every single character and what it did. Only after everything was clear did I move on to the next function.
I did skip through a few things and quickly found that I was lost. I had to go back and look through what I had skipped so that I could move forward without any issues. This was bad, it took some time from me which could have been avoided.
Let’s Code!
Enough with the workflow, let’s talk about how I developed the game already.
Below are some of my additions and adjustments. I played a lot while I developed so I knew how the player would feel, what would be easy and what wouldn’t. I hated the lack of some features so I added those myself.
Adding Keyboard Shortcuts
While developing my version of galaxian, I played it a lot. Really, most of the time I just played it. I got tired of clicking on the “try again” button with my mouse every time I died.
Also, if I listened to the same background track over and over again I would have gone insane. I had to implement a mute/unmute switch.
I made clickable buttons for it but figured that keyboard shortcuts would be much more convenient. Here’s what I did:
/*

  Other various keypressing stuff

 */

document.onkeypress = function(e) {

  //restart the game only if the player is dead

  if(e.which === 114 && document.getElementById('game-over').style.display === "block") { // "r" to restart the game

    game.restart();

  } else if (e.which === 109) { // "m" to mute/unmute the music

    mute(); // look below for source of this one

  }

}
And here’s the mute() function:
function mute() {

  // background music is playing

  if (game.backgroundAudio.volume !== 0) {

    game.backgroundAudio.volume = 0; // set it's volume to 0

    document.getElementById('musicMuter').innerHTML = "Off";

  }

  else {

    // background music is not playing, pump it up!

    game.backgroundAudio.volume = .7;

    document.getElementById('musicMuter').innerHTML = "On";

  }

}
I now could quickly restart the game and mute the music. This made me play the game even more!
Moar Challenge!
Originally, the game didn’t have any levels or bosses to make it challenging. Since I played my version of the game a lot, it got boring pretty quickly. To make it more fun I added levels to the game.
This really isn’t too hard to achieve.
When the game starts, the level is 1. I needed to set this value so that it could be used later on:
function Game() {

    … // code removed for brevity
    this.init = function() {

        …
        this.level = 1; // this can be used everywhere via game.level
        …

    };
    …

}
When the player kills every enemy, we increment the level and spawn new enemies:
function animate() {

    …
    // no more enemies

    if (game.enemyPool.getPool().length === 0) {
        game.level += 1; // incrementing the level by one

        game.gameLevelUpAudio.play(); // shout out that the level is now higher!

        game.spawnWave(); // arise, my champions!

        game.background.speed = game.level; // make it look like the ship's flying faster
        // add some feedback so the player knows s/he achieved something

        // I do that by displaying '<div id="#level-up">Level Up!</div>'

        document.getElementById('level-up').style.display = "block";
        // remove "level up" notification after one second

        setTimeout(function() {

          document.getElementById('level-up').style.display = "none";

        }, 1000);

      }
    …
}
Whenever the player kills all the enemies on the screen, game.enemyPool gets emptied. That’s good to know because at that point I can increment the level (game.level += 1).
I then use game.level to adjust various things.
Every level the background pans faster, imitating the speed of the ship:
// first level pans the background for 1px,

// second level pans the background for 2px and so on

game.background.speed = game.level;
We also award the player with higher scores for killing enemies at higher levels:
function Enemy() {

    …

    if(!this.isColliding()) {

        …

    } else {

        …

        game.playerScore += (10 + game.level); // so one enemy at, say, fifth level is worth 15 points

        …

    }

}
We can also make the game more challenging by incrementing the speed of enemies bullets at every level:
function Enemy() {

    …

    this.fire = function() {

        game.enemyBulletPool.get(this.x+this.width/2, this.y+this.height, -.5 - game.level);

        // note the '-.5 -game.level' part

    }

    …

}
By doing all this, the player can reach level whatever, there are no restrictions. The variable game.level just increments when you kill all the enemies.
No More YOLO!
Originally, the game is a literal YOLO (You Only Live Once) representation. A single hit meant game over which I, as well as people who played my game, didn’t like.
I should note, I added this feature after I released the game. So this part is not what I did in two days. But it’s pretty simple and I wrote that fairly quickly as well.
First things first, we need to add some kind of variable to the game object which represents how many lives a player has:
function Game() {

    …

    this.init = function() {

        …

        this.playerLives = 3; // tree fiddy

        …

    };

    …

}
Whenever a player dies, we decrement the value of game.playerLives. I also check to see if game.playerLives is not zero, because if it is, the game is over. To achieve this I changed the code quite a bit.
At first, I added a new die() function to the Ship() object:
function Ship() {

    …

    this.die = function() {

        game.playerLives -= 1; // decrement the value

        if(game.playerLives <= 0) { // oh boy, you're dead!

            this.context.drawImage(imageRepository.spaceshipDown, this.x, this.y);

            this.alive = false;

            game.gameOver();

            document.getElementById('lives').innerHTML = ""; // note this, will explain later on.

        } else { // this is a triumph, you're still alive!

            game.restart("continue"); // restart the game

            // note the "continue" argument. Will explain this soon.

        }

    };

    …

}
I should have probably called it this.hit() or something instead of this.die(), as the former is more self-explanatory.
With this, I had to make sure that the game can still know when the player is hit. This was simple:
function Ship() {

    …

    // Finish by redrawing the ship

    if (!this.isColliding) {

        this.draw();

    } else {

        this.die();

        // all the rest that originally was written here is now in die() function

    }

    …

}
Remember game.restart("continue") in the Ship() object? Now, what’s with that “continue” bit?
Whenever the player dies, I needed to make sure there were no bullets left on the screen and a new wave of enemies was spawned. The function game.restart() does almost the exact same thing. Almost.
When the game is restarted, game.restart():
- clears every
<canvas>element - uses
this.quadTree.clear()to, well, clear the quadtree - sets background position to
0,0 - initializes bullet pools
- and a few other things
But game.restart() also resets some values back to their default ones which is not what I needed for my YOLT (You Only Live Thrice) game feature.
When the player is hit by a bullet but still has some lives left, I didn’t want to reset the level, the score, the background speed or play the starting audio again (that wouldn’t make sense, would it?). That’s why I used the “continue” argument. Here’s the new game.restart() function to make it all clear:
function Game() {
    …
      // Restart the game

      this.restart = function(condition) {

        // var condition is condition or,

        // if it's not set (thus is falsy value),

        // is just an empty string.

        // I do this to prevent undefined variable error

        var condition = condition || "";

        // You can achieve the same result using this as well:

        /*
        if(!condition) {

            var condition = "";

        }
        */
    // didn't change anything notable below
        this.bgContext.clearRect(0,0, this.bgCanvas.width, this.bgCanvas.height);

        this.shipContext.clearRect(0,0, this.shipCanvas.width, this.shipCanvas.height);

        this.mainContext.clearRect(0,0, this.mainCanvas.width, this.mainCanvas.height);
        this.quadTree.clear();
        this.background.init(0,0);

        this.ship.init(this.shipStartX, this.shipStartY, imageRepository.spaceship.width, imageRepository.spaceship.height);

        this.enemyPool.init("enemy");

        this.spawnWave();

        this.enemyBulletPool.init("enemyBullet");
    // here comes my changes
        // I guess you can figure this out, but I'll explain it in a bit

        for(var i = 1, lives = ""; i <= game.playerLives; i++) {

          lives += '<img src="images/live.png" />';

        }

        document.getElementById('lives').innerHTML = lives;
        // if condition is NOT equal to "continue" string, do the following

        if(condition !== "continue") {
          // here we reset the values that should only be reset when we play a new game

          // and since condition IS equal to "continue" only when a player is hit

          // but still has lives left, the following code is executed whenever

          // you call game.restart() without any arguments, hence the same way as before.
          document.getElementById('game-over').style.display = "none";
          this.playerScore = 0;

          this.playerLives = 3;

          this.level = 1;

          this.background.speed = 1;
          this.start();

          game.gameStartAudio.play();
        }

      }
    …
}
So if you call game.restart() it does exactly the same thing as before. However, calling game.restart("continue") doesn’t reset some values. This is exactly what I needed to allow the player to get hit but still keep the same level, score and background speed.
Of course, I could have just written another function like game.playerHit(), but that one would repeat a lot of lines that are the in game.restart(). And I like DRY coding, that’s why I did that.
I bet there are better ways to do this, let me know in the comments if you came up with something more convenient.
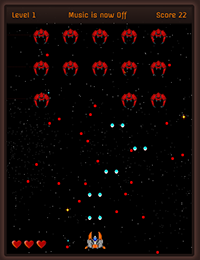
Don’t forget the player; S/He needs some feedback to know how many lives there still are. I just added three images to the index.html file:
<div id="lives">

  <img src="images/live.png" alt="" />

  <img src="images/live.png" alt="" />

  <img src="images/live.png" alt="" />

</div>
and adjusted the amount of those img tags in the game.restart() as you probably already noticed:
function Game() {

    …

    this.restart = function() {

        …

        for(var i = 1, lives = ""; i <= game.playerLives; i++) {

            lives += '<img src="images/live.png" />';

        }

        document.getElementById('lives').innerHTML = lives;

        …

    };

    …

}
Custom Assets
Steven provides the source code with all the images and sounds. I already moved some things around so figured custom assets would be a great idea as well.
I googled .pngs for a background, ship, and enemies. I drew the bullets myself because, well, that’s all I can draw. A friend of mine drew those nice little hearts the represent lives.
Custom images meant different widths and heights than those provided in the guide. But after retyping and examining all the code, I was really comfortable with it and the adjustments were very easy.
I also googled sounds. There are plenty of free sources (here’s the one I used for beginning, level up and game over) if you can’t make your own sound effects.
I made the background music only because I didn’t want to use any copyrighted material. It really was a lot faster to just add my own .mp3 file that I composed some months ago than get lost in google for hours trying to find something I’d like.
Also, I added an original sound effect of a blaster gun from Star Wars for shooting. I hope I don’t get sued…
Final Touches
After I added the features, I found that the game lacked even though the JavaScript part was complete. I could play the game, it was pretty fun and all, but it looked like crap. I needed to add some CSS before I could show it to my friends. I also needed to name it.
“Supreme Mech Explosion” What?
I had no idea how to name my game. This is where this random video game name generator helped me. I clicked “generate” a few times until “supreme mech explosion” showed up. It felt perfect: it had “supreme” and that’s the word every cool game has in its title, it contains “mech” which sounds a lot like “meh” and it has “explosion” in it (Michael Bay, anyone?).
Styling the game
I work with SASS during my day to day work and I love it, it makes writing CSS a lot faster. Also, Bourbon goes hand to hand with SASS almost always for me. I used both for the game.
I don’t think there’s any need to animate anything not directly related to the game logic via JavaScript in <canvas>. There are CSS transitions for that. Those perform really well on modern browsers and that’s what I chose.
Writing keyframed animations with SASS and Bourbon is really easy. Here’s what I used for the level up effect and the game over dialog:
@include keyframes(levelUp) {

  0% {

    opacity: 0;

    @include transform(translateY(20px));

  }

  50% {

    opacity: 1;

    @include transform(translateY(0));

  }

  90% {

    opacity: 1;

  }

  100% {

    opacity: 0;

  }

}
@include keyframes(gameOver) {

  0% {

    opacity: 0;

    @include transform(translateY(20px));

  }

  100% {

    opacity: 1;

    @include transform(translateY(0));

  }

}
Which I used like so:
.game-over {

    @include animation(gameOver 0.3s ease-out);

}
#level-up {

    @include animation(levelUp 0.8s ease-in-out);

}
I’m not going to spend your time talking about every CSS bit. Check out the source code of my game if you’re interested.
It’s Done, It’s Finished
The game at this point was finished and I could proudly show it to my friends. It worked smoothly (thanks to Steven’s techniques), looked nice AND it was made by me. There are many like it, but this one is mine.
If you’ve never developed a game before, now’s the time to start. It really is not that difficult and, believe me, it’s a lot of fun. You can play games while you develop which I find absolutely awesome!
Key Points and Conclusion
I never developed a game before I made this one. I thought it was a difficult and time consuming process, but that’s not entirely true. Developing small games is fun and fairly easy, especially if you have strong JavaScript basics (that’s all I have).
Here are a few things that might help you understand game development better (it surely helped me):
- A game is a living being. It comes to life as soon as you write a function that constantly updates the screen. FPS is the heartbeat
- Animation, fundamentally, is a change of an element’s coordinates (and/or shape and color) in a certain period of time. Don’t overthink that
- Don’t be a developer only, play the game and see if you enjoy it yourself
- Make visual effects as simple as possible. I could have added the “Level up” effect via JavaScript directly to the
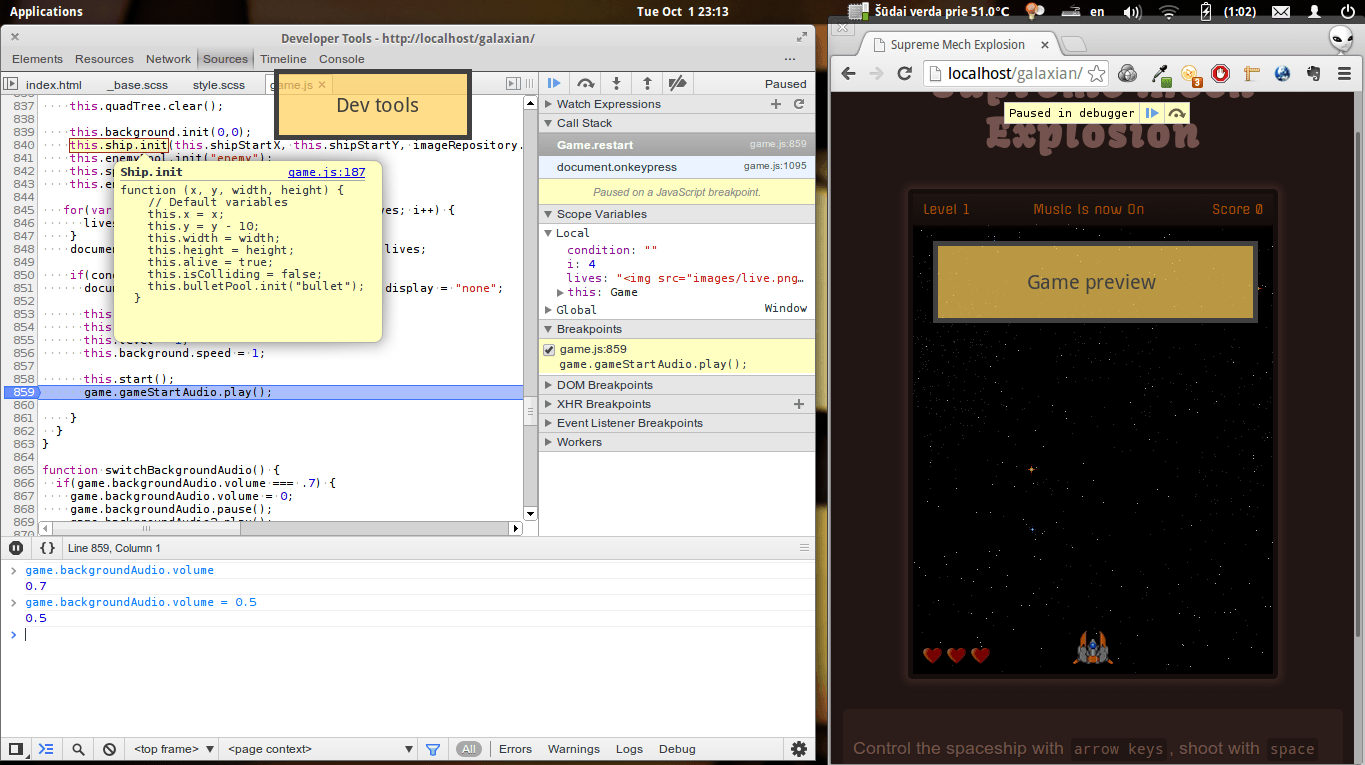
<canvas>but instead I used CSS. It looks smooth and performs much faster - Get to know the dev tools really well. You can’t really inspect the
<canvas>element to see the game parts but you can inspect the JavaScript. Use breakpoints, use conditional breakpoints, watch expressions, look through the function call stack, and use the console - Use google when lost. I have yet to stumble upon a question with no answer on Stack Overflow
- Libraries will help you a lot only when you understand the fundamentals. I’m currently experimenting with CreateJS Suite and will probably continue developing games. Because it’s awesome!
Thanks again to Steven for a great series of tutorials and an opportunity to write this post. I really had no idea how to animate with JavaScript just a few days ago and here I am writing this post to encourage you all to try your hand at it as well.
I hope I’ve been clear enough but feel free to ask any questions either here in the comments, or shoot me an email at argshook [at] gmail [dot] com. Thank you for spending the time to read this!